Training Plan for Coil Prep and Forming Automation Ramp-Up
A coil prep and forming automation ramp-up can quietly create the worst kind of risk: steady production looks fine until a safety near miss, a quality escape, or a throughput collapse shows up mid shift. A staged, training-led rollout reduces that operational risk by limiting early scope, proving readiness with real parts, and expanding only when the process is stable and supportable.
Risk Assessment and Safety Controls for Coil Prep and Forming Automation
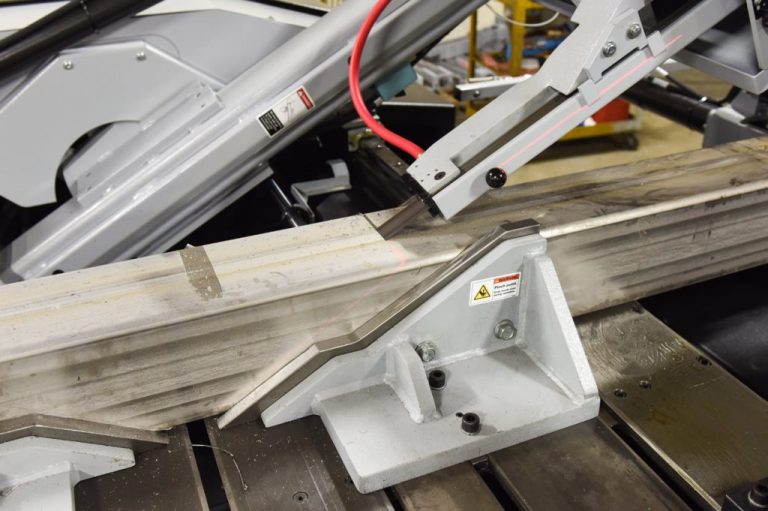
Start with a documented risk assessment that covers coil handling, decoiler threading, pinch points at straighteners, servo feeders, and guarding and interlocks at the press interface. The goal is to prevent new hazards introduced by higher speed, stored energy, and automatic motion that operators cannot predict by sight or sound.
Build safety controls into the ramp-up plan instead of adding them after issues appear, including LOTO steps that match the automation states and clear safe-position definitions for setup and maintenance. Tie safety signoff to readiness so the cell cannot progress to broader use without verified guarding, light curtains if applicable, and tested e-stops.
Common failure points during adoption:
- Allowing manual reach-in habits to persist near automatic threading or jog functions
- Incomplete LOTO that does not address pneumatic, hydraulic, and stored coil energy
- Bypassed interlocks during troubleshooting that are not restored and re-verified
- Unclear responsibilities between maintenance and operations during jams and resets
- No defined safe speed limits for first-run learning and validation
Ramp-Up Plan and Resource Scheduling for Equipment, People, and Materials
Use a narrow early scope: one coil width range, one material family, and one forming recipe with known demand, then expand after stable results. Begin with a small trained group on one shift, run validation parts at reduced speed, confirm acceptance criteria, and only then add product variants, speed, and additional shifts.
Resource scheduling should protect production by booking short, repeatable time blocks rather than long shutdowns, and by staging materials ahead of time. Reserve equipment access windows for installation verification, sensor calibration, and feeder timing, and ensure spare wear parts and critical sensors are on hand before the first production trial.
Go-live cutover plan basics:
- Define the first product family and lock the scope for 2 to 4 weeks
- Run off-line dry cycles and thread tests before introducing production coil
- Schedule validation runs during low-risk windows with leadership present
- Keep a fallback path to the manual method with clear triggers to revert
- Plan spare parts, tooling readiness, and a rapid-response troubleshooting rota
Operator and Technician Training Pathways by Role and Shift
Training must fit the reality that top operators and supervisors cannot disappear for days, so deliver role-based modules in short sessions, supported by job aids and supervised practice. Start with a core team of lead operator, setup tech, maintenance tech, and quality, then have them coach peers as the cell expands to other shifts.
Separate pathways by responsibility: operators focus on safe threading, recipe selection, start-up checks, and jam response, while technicians cover sensor setup, feeder timing, straightener adjustments, and fault diagnostics. Supervisors and leads need training on readiness gates, escalation rules, and how to protect the process from premature speed increases.
Training plan that works with a busy crew:
- 30 to 45 minute micro-sessions at shift change for 2 weeks, focused on one task each
- One coached run per operator using validation parts with a designated trainer present
- Pocket checklists and visual aids at the cell for threading, start-up, and recovery
- A train-the-trainer ladder so the first shift builds capability for second and third
- Weekly 20 minute review of top faults, scrap causes, and safety observations
Checklists, Standard Work, and Templates for the Production Floor
Standard work is the stability tool that makes automation repeatable across shifts, especially during the awkward middle phase when some tasks are still manual. Prioritize the documents that prevent the most common failures: threading method, recipe selection, coil changeover, first piece inspection, and jam recovery.
Use templates that force clarity on who does what and when, including escalation triggers and stop rules. Keep them short, visual, and posted at point of use so they support production rather than becoming a binder nobody opens.
Standard work and maintenance essentials:
- Start-up checklist with safety checks, sensor status, and lubrication confirmation
- Coil changeover checklist with coil ID capture, edge condition checks, and threading steps
- First-piece and first-10 verification sheet tied to CTQs and tolerance zones
- Jam recovery standard that defines safe stop, clear, and restart sequence
- Preventive maintenance task list with frequency, owner, and lockout requirements
Validation Plan for Setup, Quality, and Cycle Time Readiness
Define ready in measurable acceptance criteria before the first validation coil is loaded, then validate in stages: dry cycle, single stroke, short run, and extended run. Validation parts should represent real forming conditions, including the most sensitive features and the tightest tolerances within the chosen scope.
Readiness should be confirmed on each shift that will run the cell, not just on the day shift. If the process meets the criteria at reduced speed, only then increase speed in controlled steps while watching scrap, uptime, and tool wear.
Validation parts and acceptance criteria:
- Validation parts chosen from the first product family with known historical capability
- Quality ready: CTQs meet print, first-10 within limits, and no new defect modes observed
- Cycle time ready: achieved target rate within a defined band after warm-up
- Scrap ready: scrap and rework below an agreed threshold over an extended run
- Uptime ready: planned uptime target met with documented top loss reasons
- Safety ready: all guards, interlocks, and e-stops tested and LOTO verified
For equipment selection and how automation modules typically integrate into forming cells, review the support resources and system overviews available at https://mac-tech.com/.
Keeping Performance Stable After Ramp-Up Through Audits and Continuous Improvement
Stability comes from a closed loop that makes problems visible and repeatable to solve: standard work adherence, routine maintenance, issue escalation, and a weekly review. Put in place short audits that check the few items that drive most losses, then track corrective actions to completion with an owner and due date.
After go-live, maintenance scheduling usually shifts from reactive fixes to planned checks on feeders, straighteners, sensors, and lubrication, timed to production realities. Create a clear escalation path so an operator can stop safely, call for help, and capture the failure mode without workarounds that erode safety and quality.
FAQ
How long does a coil prep and forming automation ramp-up typically take?
Expect 4 to 12 weeks depending on product variety, coil quality variation, and how many shifts must be brought online.
What most changes the ramp-up timeline?
Unplanned scope growth and lack of scheduled training time extend timelines more than the equipment itself.
How do we choose validation parts?
Pick parts in the first product family that stress the process, such as tight tolerances, critical surface requirements, or historically sensitive forming features.
What should we document first in standard work?
Start with threading, start-up checks, first-piece approval, jam recovery, and coil changeover since these drive safety, scrap, and downtime.
How do we train without stalling production?
Use short modules at shift change, coached runs with a small core team, and job aids at the cell so learning happens in controlled production windows.
What metrics show the process is stable after go-live?
Stable uptime, scrap below the threshold, consistent cycle time, and decreasing repeat faults across shifts indicate the process is under control.
How does maintenance scheduling change after go-live?
You will add routine inspections and calibration checks for sensors, feeders, and straighteners, and tie them to planned downtime instead of waiting for failures.
Execution discipline is what turns staged modernization into real throughput and quality gains while production continues. If you want help packaging training, checklists, and readiness gates into a practical rollout, use VAYJO as your training resource at https://vayjo.com/.
Training Plan for Coil Prep and Forming Automation Ramp-Up